We help Microsoft-centric enterprises fully adopt the cloud & adapt to new ways of working.
\

CATEGORY

Desk booking

What are hybrid meetings?

As we emerge from the pandemic, the way we work is likely to have changed forever.  The term ‘hybrid working’, reflects a now commonplace scenario where the workforce comprises a mix of remotely based and office-based colleagues.

Hybrid meetings are a new genre of meeting, where participants might be in the same physical meeting room OR connecting in from home or other satellite location over a video conference link.

Having good technology is an important component in facilitating such meetings:  A poor-quality microphone and lack of presentation and visual aids that offer a shared experience can wreck your hybrid meeting.

There are lower-tech, more practical considerations for your meeting, such as having the optimal acoustics and seating arrangement for video conferencing to take place.

Equally important is having clear guidelines and etiquette that enable remote participants to participate and contribute on an equal footing to their colleagues that are physically ‘in the same room’.

Here are our tips for facilitating successful hybrid meetings.

Check the tech

Don’t spend half of your allocated meeting time fighting with technology and a lack of facilities.

  • Make sure the meeting room you book has the right equipment and services to support your hybrid meeting.
  • Get any special equipment such as a video conference screens, microphones, speakers and interactive whiteboards booked and set up in advance by in-house AV experts.
  • Ensure the seating layout and lighting in your room is optimal for including all ‘in room’ participants on camera.
  • If you have visitors, make sure they have the right guest network credentials and HDMI connection options in order to share content from their laptop or tablet.

Microsoft has some of its own tips for preparing your hybrid meeting workspace in this article:  https://support.microsoft.com/en-us/office/hybrid-meeting-space-considerations-6a526e5a-b036-42a9-b9fe-8131efd75390

Brush up on hybrid meeting etiquette

When you have a ‘hybrid meeting’, it’s easy to make a few basic mistakes than can make remote colleagues feel disenfranchised.

Continuing a conversation that started during a coffee break (that remote colleagues are not ‘privy to’) or using conventional flip charts or post-it notes as visual aids (that can’t be viewed outside of the room), are examples of behaviours that will hamper effective collaboration.

Even when attending in person, some individuals may feel uncomfortable making their voice heard in a heated debate.   Sadly, it’s even easier to shrink into the background when joining a meeting as a remote participant.

You can resolve these issues with good hybrid meeting etiquette and using appropriate technology.

For example, polling everyone for their input at regular intervals and making it clear on the outset how you plan to handle questions or how you want participants to raise questions.

If you’re using Microsoft Teams, make sure you keep an eye on the raised hand facility or chat window and invite remote attendees by name to share their comments and points.

PRO TIP: If you’re presenting on a Teams call, instead of sharing the screen you have your PowerPoint presentation running on, use the Teams Presenter Mode https://www.youtube.com/watch?v=ZderL8-LVc0

That way, you can continue to see the other people on the call as you present.

You can also use the recently announced new Surface Hub Whiteboard facility for a unified experience for your hybrid meeting.

Upskill for hybrid meetings

Along with training on etiquette for organising and running hybrid meetings, a general brush up on meeting skills and best practices for on-camera presentation could be introduced as part of your company’s learning and development content.

For example, one principle we always try to stick to is to keep the camera switched on when having virtual meetings with clients and colleagues.

When you add facial expression and body language to a social interaction you are creating a far richer communications experience that can help avoid any confrontation or miscommunication.

And, along with the whiteboard utility and presentation mode feature we mentioned earlier, there’s other new tools to become familiar with, such as how to configure and conduct ‘break out rooms’ in Teams.

https://www.essential.co.uk/blog/articles/teams-breakout-rooms/

PRO TIP: Trawl the internet for resources, including Microsoft’s own training videos, and build a knowledge base and mini training course on your intranet or learning management system.

Pick the right sort of meeting

As we’ve discovered during the pandemic, many meetings can be conducted extremely effectively – and very efficiently – over a remote link.   In fact, many meetings work better in a remote format.  For example, my own failing eyesight means it’s often easier to review figures and detailed content in presentations on my own zoomed-in screen.

There’re some meetings, however, where it really does pay off to get all participants in the same physical meeting space.

For example, if you’re wanting to harness the creativity of a team with some ‘blue sky thinking’, introduce new colleagues to their co-workers and forge bonds over pizza and beer, then a physical meeting is your best option.

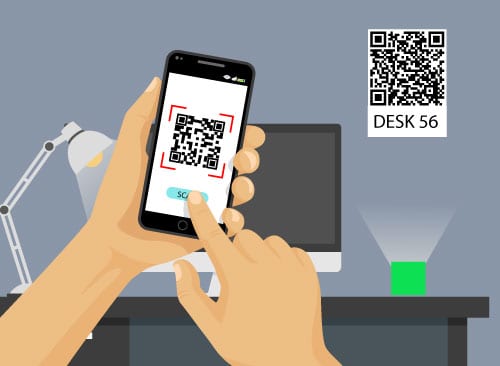
Make meetings easy to organise

Streamlining the process of planning and booking a meeting, be it an ‘all hands in the office’ or hybrid meeting will help you get the most out of your tine together.

Workplace booking systems can be extraordinarily effective at enabling this, making it easy to:

  • Find and then book a suitable workspace, along with resources like video conferencing equipment,
  • Request additional facilities and services such as catering, parking spaces and AV assistance,
  • Prioritise bookings for specific groups on specific days.

Microsoft is about to announce new capability in its Teams meeting settings that enable the certain tasks involved in setting up a hybrid meeting to be delegated to an assistant.

Workspace booking tools (like those available from Essential) make it possible to organise myriad other meeting facilities and services directly from Microsoft Outlook or Teams when you schedule the meeting in the first place.

Such tools can also help your facilities team optimise the utilisation of video conferencing facilities (let’s face it – they’re not inexpensive), get a clear picture of how their video conferencing facilities are being used, and predict what future provisions need to be made to support your new hybrid workforce.

Hybrid meeting room booking software for Microsoft 365

Read more about services to help your enterprise book, provision & manage your workplace for hybrid working and beyond.

Does the workspace booking system you’re planning involve selecting an available desk from a list or an interactive floor plan?  If so, physically applying the corresponding numbers to your desks in the office is a vital part of the jigsaw.

You’d be surprised to know the number of projects we’ve encountered where this step was not ‘in the plan’.

“We only have a 30 hot desks and staff already know where they are”

“We’ll put a big print out of all the desks on the wall in reception”

“It will make our desks look untidy”

These are just some of the comments that we hear regularly.  But (sorry) they’re not valid excuses for failing to clearly and individually desks in a way that matches in with your desk booking system.

You only have to think about what happens when someone parks in ‘bay 9’ instead of ‘bay 6’ to understand what confusion and ‘world of pain’ can ensue as everyone has to work around the mistake of occupying the wrong space.

Returning to a ‘hybrid office’ space, with different desk layouts and new collaboration spaces can be daunting enough – even more so if you’re a ‘new start’.  The last thing you’ll want is an argument over whether you’re sitting at the right desk or not.

What’s the best way to physically number desks?

By all means, you can use individual desk devices that incorporate contactless booking and check-in functionality, a status indicator and the desk number in one neat package, but you don’t have to go to this expense.

Our low cost favourites include:

Engraved steel disks that can incorporate QR Codes for booking and check-in using a mobile phone.

Neat desk booking sign example incorporating QR code

Not only are they nice and neat, they don’t cost a lot at all and come with different fixings.  Our team can also help you generate a file of QR codes you can send to the nice folk that make them!

A card holder clip that sits nicely on top of workstations:

Low cost desk booking signage

These cost 5 pence each and all you need is some coloured cards and a printer!  What could be simpler?  You could also incorporate a QR code into the sign.

For more tips on how to go about numbering your hybrid workspaces in a way that’s both fool- and COVID-19-proof, check out our earlier blog.

https://www.essential.co.uk/blog/articles/future-proof-your-return-to-work-desk-booking-scheme/

Covid-secure workspace management

Read more about services to help your enterprise book, provision & manage your workplace for social distancing & beyond.

Scanning a QR code from your mobile device has become a familiar way to get contactless and convenient access to restaurant menus, registering your visit to a venue using the NHS COVID-19 App, ordering a meal in a restaurant and more.

Now you can harness the power of QR codes to book the office workspaces and other resources available to your workforce.

Using strategically placed QR codes on simple and low cost printed signs, labels on individual desks or on display screens located in corridors or foyers, you can enable contactless selection and booking of a range of resources with pre-applied criteria to make life as easy as possible:

  • Show all currently available hot desks in this area
  • List the video conferencing rooms available RIGHT NOW for at least an hour
  • Display available pool cars today
  • Pinpoint all accessible desks in this office on a map

These are just a few examples of the different resources and attributes you can give your workforce instant access to.

You can also use QR codes to:

  • Enable authenticated checking into a pre-booked workspace
  • Display information about current and upcoming bookings for a room of workspace
  • Avoid displaying booking information ‘in the clear’ on digital screens

OK, so there’s some behind the scenes magic involved.

You will need a resource booking system that supports this functionality, and that is where we can help with our enterprise booking systems.

Already using Microsoft resource mailboxes to book meeting rooms or workspaces via Microsoft Outlook and Microsoft 365?

Great.  You can now seamlessly extend this functionality and use QR signs to book the same Microsoft 365 resources from mobile devices on arrival to the office.

You can also use display screens outside meeting rooms, desk status devices and fully interactive maps to provide the ultimate flexibility for your new workspace management strategy.

Get in touch to find out more.

Modern workspace booking systems

Read more about our services to help your enterprise book, provision & manage its workplace for social distancing, shrinking office space & beyond.

Are you planning a hybrid workspace booking system that’s also COVID-19 proof? As we face an uncertain future for our office space, here’s 5 top tips when it comes to how you go about identifying your desks and workspaces.

1. Walk the floor

It’s tempting to use CAD diagrams as a reference when numbering workspaces, however in our experience these can quickly become out-of-date.  Desks can get informally ‘nudged’ around and added or removed over the years.

You may also find there’s glass partitions or dividers that give extra protection that are not obvious in a CAD diagram.

There could also be some ‘desire paths’ (as opposed to the originally intended walkways around the office).  These will need to be taken into consideration (or blocked off) to avoid traffic passing too close to desk occupants.

If possible, the best starting point is to physically walk the floor and number each desk as you encounter them.  This is the best way to ensure your staff can easily find the particular desk they’ve booked with minimal hunting around (see our next point).

2. Treat your workspaces like hotel rooms.

Emulating the convention that’s used to signpost hotel rooms will help your staff rapidly locate their workspace with the minimum of effort (and minimal criss-crossing the floor).

So:

  • As with hotel rooms, use the first number to indicate the floor, and the next digits to signify the workspace number.  This will help you avoid mix-ups where there are multiple desks numbered ’15’ on each of several floors.
    3 digits will give you up to 99 numbers to ‘play with’ per floor. If you have more than 99 desks on a floor, you will need to use 4 digits in total.
  • Numbers should be allocated logically and consistently within a ‘desk block’, to minimise the amount of walking around to find a desk.
  • Likewise, consider numbering your desks in a clockwise direction as you walk around the office floor, starting from the main entrance (e.g., the main lifts).  This means you can say: “Desks 1-50 are on the left, and 51-100 on the right-hand side of the floor” which will help maintain social distancing as your workforce tracks down their booked workspaces.
  • You may consider adding signage in strategic places (e.g. other entry points to the floor) to signpost desk ranges – exactly in the way hotel room ranges are indicated when you come out of the lift at a hotel.
  • If you have a large office floor and have introduced the concept of zones or neighbourhoods to help staff members find where they need to be, make sure these conventions are physically signed across your workspace (and not just used on your workspace booking system).
Tips for numbering your desks for a Covid-secure booking system
Best way to number your hot desks

The above example shows the right way and the wrong way to number your desks.

Our tip is to imagine you are walking along the floor using the main thoroughfares and following a logical flow.   How would you feel if desk 19 was on the other side of the floor from desk 16?  Confused, we think.

Finally, even if you just have one floor of desks, it’s useful to include a ‘0’ on your desk numbering, so count 001-099, not 1, 2, 3 up to 99, as some desk booking systems sort alphanumerically.

3. Number all potential desks (not just the safely spaced ones)

We have seen (and thankfully, averted) more than one project where the intention was to only allocate a consecutive number just to the ‘safely distanced’ desks.

For example:

The key downside to this approach is that social distancing requirements may change.

Even after we are now out of this lockdown, Sir Patrick Vallance indicated that additional measures may need to be re-introduced when we move into next Winter.   This could mean the wearing of masks, but also the increasing of social distancing measures in the office.

Also, if you use a workspace booking system you will have to change up your desk numbering accordingly.

By allocating a consecutive number to each potentially available desk on the outset, you won’t need to make any physical changes to your desk numbers at a later date.

Instead, you’ll just have to amend what’s bookable in your workspace management system.

By numbering each desk, you can also take advantage of auto-zoning technology.  To see this in action, check out this video.

As you’ll see in the video, when a user selects their preferred desk, adjacent desks are automatically ‘blocked out’ according to specified rules that can be applied across the board and updated as needed.

4. Prepare for something different altogether

With the home working genie fully out of the bottle, our physical office spaces will probably never be the same again.

Research carried out by Cisco indicates that 77% of larger organisations will adopt a more flexible working policy post pandemic.   It’s not surprising, therefore, to learn that 53% of organisations predicted a reduction in their future office space footprint.

Whilst turning half of your office space into a fully stocked bar (like high-end tonic maker Fever Tree) might not be an option, shrinking or re-organising your office space to reflect your predicted future utilisation, should be on the agenda now.

If there’s any silver lining to this situation, it’s that pre-pandemic, introducing a desk sharing scheme (often referred to as hot desking) tended to be an emotionally charged affair.  In short, staff were happy to be able to work from home but were not at all happy about losing their desk.

The Coronavirus has forced the situation, with workforce safety trumping desk ownership politics.

Given that ‘return to work round two’ could be a while off yet, enterprises like Fever Tree are taking action and re-mapping their office now.

Whilst a bar might be a popular attraction for your workforce, rearranging your office space to accommodate your future needs might be more realistic.

Figuring out what workspaces will be required going forward may need some analysis:

  • How many days in the week will staff typically want to visit the office?
  • Will staff want to come in for focus time? In which case, you may need to more quiet areas.
  • Is the main driver to meet with co-workers? If this is the case, you’ll need more smaller, collaborative areas?

It’s probably going to be a mix of both types, but the reality is, you may never return to a 1:1 ratio of desks to staff.

5. Physically label your workspaces!

This is the final piece of the jigsaw and avoids much confusion.

You’d be surprised at the number of clients we encounter that allocate numbers to desks and workspaces on their floor plans and resource lists, but omit to physically label up the actual workspaces themselves.

Labelling can be as simple as printing a number on a sticker and fixing it to the desk or screen.

Also, if your workspace booking system uses a check-in option that involves scanning a QR code, you can combine the number and the code on the same label.

We’ve recently encountered this rather neat solution which uses engraved disks.  You can simply send across a spreadsheet of workspace IDs and QR codes and the engraving company will do the rest.

Other clients have used simple stick-on labels created by their local print suppliers.

Of course, you can always use more sophisticated options that include red/green status lights and RFID check in capability.

The key aim is to ensure your workforce know they have safely arrived at the correct workspace and that you as a company are able to register that fact and provide the necessary COVID-19 safety and capacity and workspace planning services ‘behind the scenes’.

Covid-secure workspace management

Read more about services to help your enterprise book, provision & manage your workplace for social distancing & beyond.

As COVID-19-related restrictions are slowly easing around the world, many businesses are preparing to return to the workplace.

However, the (as yet) unknown effects of emerging from lockdown and the ongoing threat of new variants conspire to make employees nervous about increasing their potential exposure by coming back into the office.

For those employees willing and able to consider returning to the workplace, businesses have a legal and ethical duty to create the safest possible work environment.

So how do you create a workplace that not only supports social distancing and keeps people healthy, but also reassures them that they’ll be safe when they come into the office?

This is where a workspace management solution can help.

Ensure socially distanced workspaces

Preventing staff from sitting cheek by jowl or clustering in meeting rooms is a challenge of slightly larger proportions, particularly if you’re dealing with limited floorspace.

Modern, configurable resource booking solutions can be very helpful in maximising the safe use of the facilities that you have, by:

  • Enabling employees to easily pre-book a workspace securely from any device or browser
  • Ensuring desks are never booked side-by-side unless there is sufficient spacing
  • Limiting meeting room occupancy
  • Repurposing meeting rooms as extra workspaces if necessary
  • Flagging desks with specific attributes like standing desks, accessible desks, multiple screens, multiple docking stations etc.

Pro tip: As you plan your seating assignment, having a future-proof numbering scheme is vital.

See also how technology can help with ensuring socially distanced steps in this video.

Throttle arrival and departure times

One of the easiest ways to do this is to stagger arrival, departure and break times.

This minimises the number of employees sharing lifts, stairwells and exits, and prevents overcrowding in ‘pause spaces’, and kitchens.

Depending on the size of your business, you may need to embrace shift work to achieve this.

Certainly, a booking solution can help switch up the time slots that can be booked to help avoid pinch points.

Apply strategic seating policies

Above and beyond safe distancing, it’s also a good idea to apply a few strategic seating policies via your resource booking solution.

For example:

  • Preventing critical employees from sitting in the same area together.  In the event of an outbreak, this will help an entire team needing to be quarantined at the same time.
  • Avoiding staff members booking the same workspace all the time.  As well as being a measure to prevent staff members from hogging resources, many organisations are seeing ‘hot desking’ as a way to improve cross-departmental collaboration and relationships (this will be the subject of another blog article).
  • Limiting the length of time a ‘scarce’ workspace can be used to give everyone a ‘fair share’.  A good example of this is a meeting room that has high-end VC equipment or other expensive resources.

Know who’s been in the office

Pre-booking workspaces, and then, on arrival, enforcing an authenticated (yet contactless) check-in to that workspace, is a great way of capturing accurate information on who’s been in the office.

See also section on visitors below.

Manage between-use cleaning

Sanitising workstations between users is vital to prevent the potential spread of infection. If you have cleaning staff on hand, consider using your resource booking tool to prevent successive bookings of the same desk, or enforce a short window between users to allow time for a deep clean.

If you don’t have a permanent cleaning team, a resource booking system can still help by reminding users to sanitise their workspace when they sign out of their desk for the day.

Track and trace potential infections

In the event that someone falls ill, your resource booking tool can be invaluable in tracking and tracing any potential infection chains with a complete record of every desk, meeting room and parking space that employee has used in recent days.

It’ll also be able to tell you who else used the same facilities or was seated near enough to potentially be at risk.

Enable booking of parking spaces

With infection rates still relatively high and new variants a constant risk, it’s likely that people will be wary of using public transport for the foreseeable future.

Just like with desks and meeting rooms, an automated resource-booking system can be invaluable in making the most of the parking space you have by:

  • Enabling ‘hot parking’ – assigning bays dynamically on a daily/weekly pre-booking basis
  • Staggering parking bays assigned to employees starting or leaving work at the same time
  • Returning bays to the parking pool if employees:
    • have not signed into their desk for the day (off sick or working remotely)
    • leave work early
    • are on leave
  • Keeping security informed of who is where, and when (including visitors)
  • Giving staff members that are worried about travelling by public transport peace of mind that they will have a safe place to park on arrival.

Keep visitors safe

Employees aren’t the only people you need to keep safe on your premises.

Visitor’s movements also need to be managed for social distancing reasons.

Consider using your resource booking tool to assign passes to restrict visitor numbers, pre-book meeting rooms and make appropriate parking available to ensure safe and easy entry and exit from your premises.

It’s also possible to make provision of visitor’s details a pre-requisite of organising an ‘external meeting’ to feed into your track and trace measures.

Educating visitors on safety protocol before arrival is also important – more on that in a bit.

We also like to recommend that our customers incorporate the presence of hand sanitisers and any traffic flow as part of their interactive workspace booking floor plans.  This will help reinforce the safety measures you have put in place and put minds at ease.

Prepare visitors prior to arrival

Visitors will also need to understand and abide by your health and safety rules while on your premises.  Again, you could use something like Microsoft Forms to achieve this, and:

  • Convey visitor procedures
  • Securely capture any pertinent personal details (subject to your pre-existing governance protocol)
  • Record consent to limit liability

Pro tip: Industries with more complex visitor protocol may prefer using LMS365 for its comprehensive training capabilities.

Conclusion

Returning to the workplace is going to be a challenging adjustment for many.  With the right tools and planning, however, we can ease that adjustment significantly, protect our most valuable assets (our people), and minimise the anxiety of returning employees.

You can reduce the costs and overheads of introducing COVID-19 safe provisions.

Perhaps even more importantly, we can begin the transformation to a new and better ‘normal’ that embraces the flexibility of the workplace of the future.

Covid-safe workspace booking

Read more about using resource booking and learning management tools to support a secure return to the office.

Many workspace booking systems offer the ability to book and locate a workspace via an interactive floor plan.

An interactive floor plan typically comprises a series of graphics depicting your office layout floor by floor (or area by area), overlaid with an intelligent and dynamic booking element that uses ‘hot spots’ and colour coding to show free/busy status, along with pinch and zoom, point and click interaction.

Many systems also support the ability to book a socially distanced desk. Some systems can even identify the location of co-workers that have booked desks on the same day, enabling you to book a desk that’s close by for optimum collaboration.

In short, floor plans are a great way of doing things, as they give your workforce at-a-glance visibility of what workspaces are available on the day they want to come into the office, and where the workspace is located.  I for one, am keen to find a desk that’s close to vital services, such as the coffee area, printers and the loos!

Regardless of which booking system you select – or even if you simply want to use printed maps in your reception/lobby areas – here’s some top tips on how to create the best floor plan graphics to use as the basis of your workspace booking system:

1. Put yourself in the shoes of the observer

Before uploading a map into your system, check it’s the right (and logical) way up.

A key thing to bear in mind is that conventions for orienting a map or architectural diagram can vary.

For static ‘geographical’ maps, north is always up.  If you’re depicting objects like buildings, the convention should be to show the main entrance of the building at ‘the bottom’ of the map, regardless to where north is.  Plans for new builds, however, can tend to follow a ‘north equals up’ convention.

Another consideration is context.

If your booking system is to be displayed on a big screen in your main reception, then our best practice guideline is to create a ‘heads up’ experience for the viewer.

By this I mean, if meeting room ‘A’ is shown on the left of the floor plan, the room itself should be physically ‘off to the left’ of the screen it’s displayed on.

Covid has, however, changed the whole ‘touch screen in reception’ experience. 

Now, given that most bookings will be made remotely from home or from a mobile device, the best strategy is to orient your floor plan according to the most typical ‘end user experience’ of entering the office.

This means orientating the map with the main entrance at the bottom of the screen (and clearly labelling any other entrances – e.g. Car Park Entrance).

2. De-clutter (don’t just use a default CAD diagram)

CAD diagrams of your office are great for the facilities team as they show details of cabling and plumbing and provide accurate measurements for occupation planning and so on.

Showing the detail of every stall in the loos and every stick of office furniture is too much information when you just want to book a desk.

Avoid floor plans that have far too much detail.

Tips for simplifying your maps are:

Focus on just the basics.  Drop the details and leave behind just the components that will help your workforce select, and then later find, their chosen workspace.  This means paring it back to:

  • The basic office shape
  • Entrances & exits
  • Lifts & staircases
  • Desks & numbering*
  • Storage for personal effects (important where staff no longer have a dedicated desk)
  • Meeting rooms & names*
  • Coffee areas (everyone knows where these are)
  • Loos (ditto)
  • Copying/scanning equipment
  • Recycling points
  • Accessibility
  • Features & attributes of the desk, such as:
    • Standing desk
    • Docking station
    • Multiple screens
  • Likewise, facilities available in a meeting room, such as:
    • VC equipment
    • Flip chart
    • Smartboards

Strip away the detail using your CAD package. It may be possible to go back to the originator of your CAD drawings and get them to ‘turn off’ the layers of detail you don’t need, and just leave you with the elements that are required for the job in hand.  Refer to this article for an example of how to achieve this in AutoCAD

Use icons where possible. Instead of drawing every cubicle in the loos, just put the relevant symbols in place. And there’s no need for a legend if your chosen symbols are recognisable.

3. Be prepared to re-draw your CAD floor plan from scratch

Our top tip here is to be prepared to re-draw your optimal floor plans from scratch, using your CAD diagrams as a guide.

Why?

Often access to the original CAD application and drawings is difficult.  Although you may have a PDF version of the CAD diagram, being able to access the individual layers and disable them is either a) impossible or b) can take an inordinate length of time.

Another reality is that you may only have access to a rough copy of an original CAD diagram that’s been copied, scribbled on and re-drawn several times over.

Below is typical of what we might be given to work with.

In this case the client didn’t have access to the original CAD diagrams and many ad-hoc changes had been made over time anyway.

The resolution was poor and you’ll notice that the main entrance to the building is depicted at the top of the diagram, so the map actually needed to be rotated by 180 degrees and recreated from scratch in order to be legible and make logical sense to the viewer.

By redrawing your maps you will benefit from:

  • A clearer visual for staff
  • A much smaller file size that will render quickly and cleanly on any browser or mobile device

Scalable vector graphic (SVG) files in particular are very efficient file formats to work with and enable rapid zooming in and out without loss of resolution.  Even if your chosen workspace booking platform works with jpgs, we recommend creating your original graphic in a vector diagramming application as this will make it easy to go back and make any amendments in the future.

Tips for creating your vector graphic floor plans are:

  • Use a vector diagramming package such as Adobe Illustrator or Inkscape (available free online)
  • Start with an initial page size/format that matches in with your typical viewer’s device.
    •  If this is the desktop, then start with 1920×1080
    • If this is a mobile display, start with 414×896
  • Import any existing floor plan graphic you have as a starting point
  • Scale it on the page to be a large as possible
  • ‘Lock it in place’
  • Start ‘tracing’ over your floor plan, adding just the basics**
  • Use copy and paste, step and repeat to build up key components, like blocks of desks.

You’ll quickly build up a floor, and then with a bit of luck, you’ll have similar layouts that repeat from floor to floor.  At the very least, the building footprint, stairs, lifts and WCs are often in the same location across all floors in a building!

Before:

After:

4. Don’t be afraid to use artistic licence

Just like the award-winning design for the London Underground map, helping your workforce choose and find a workspace does not demand a slavishly accurate rendition of your actual floor plan.

Believe me, individuals will NOT be out with their tape measure with a view to calling you out on a discrepancy of real-life VS your electronic floor plans.

For this reason, you may wish to employ the following techniques to aid visibility:

  • If your default layout is landscape in format, but your building is long and skinny, simply make it ‘wider’ than it is in reality. This will allow you to use larger proportions for workspaces and labels.
  • Reduce the size of insignificant features like a long connecting corridor

5. Pick up on design cues & use colour to ease navigation

If there is a strong design element to your office, then reflect this in your diagrams to aid familiarity.

For example, we have depicted such navigation ‘aids’ as:

  • Reflecting the different coloured carpets used in each zone.
  • Labelling ‘external landmarks’ (for example, a customer in Canary Wharf wanted to help staff navigate by depicting the view out of each window (HSBC, O2, etc)
  • Picking up on décor such as different coloured meeting rooms

Ultimately, we always recommend you reflect any corporate colours and fonts that reinforce your company brand.

TIPS

  • Avoid over-use of the colours red and green. Red, green (and often amber) are the colours that are typically used to show the free/busy status of workspaces on your floor plan.  It’s therefore a good idea to avoid use of these colours to avoid confusion.
  • Avoid design by committee. Whilst it’s a good idea to get input from the various different stakeholders in your company, reflecting everyone’s views in the design process can result in a lack of simplicity.

6. You may need to review numbering and naming conventions

This subject is a whole new conversation again.  Bear in mind that the labels on CAD diagrams may not relate to actual meeting room names in use.  Also many of the customers we work with that are implementing desk booking systems don’t already have a desk numbering system.

Once you have devised your optimal desk numbering system, you’ll need to individually number each workspace, but you don’t necessarily need to apply a number to each desk shown on the interactive map.

Covid-secure workspace booking

Are you planning a ‘Covid-secure’ workspace booking system? Here’s 4 top tips when it comes to how you go about identifying your Covid-secure desks.

Your workspace booking floor plans are a great opportunity for you to reinforce your Covid-secure messaging and precautions to provide reassurance to your workforce.

In addition to any built-in Covid secure capability your booking system has, such as automatically blocking off adjacent desks when you make a booking, consider adding the following:

  • Traffic flow signage
  • Hand sanitising stations
  • Departmental zones
  • Cleaning stations & contact points

Other capabilities you should look for in a Covid-secure workspace booking solution include:

  • Self-certification of staff members when they book workspaces
  • Authenticated (yet contactless) check-in (this will allow you to track exactly who’s used what workspace)
  • The scheduling of between-use cleaning
  • Policies that govern who can book what spaces when (and how often) – the subject of our next blog
  • Capture of information to support contact tracing
  • Registration of visitors and safety instructions

Conclusion – It’s Worth Putting in the Effort

Making your office floor plans clear, informative and great looking will be a good investment on your part:

  • By helping staff members choose and book their optimal workspace, that’s near the resources they need and has the attributes they desire, they will be as productive as possible when they’re in the office.
  • It will allow you to demonstrate the precautions you are taking to keep your workforce safe and help put minds at ease as they return to the office.
  • It’s a very visible service, and as we get back to the ‘new normal’, may be seen by visitors to your office – not just your own workforce.  Done well, it will convey a slick and professional image for all concerned.

See our meeting room & hot desk booking solutions in action!

There’s many other things to consider when implementing systems designed to streamline your room & resource booking systems, contact us to find out more.

Having a naming convention for identifying meeting rooms in a large organisation can be a challenge – especially when there’s 100’s of different rooms, floors, room sizes, room types, different locations and so on.

An example we saw at a customer site recently incorporated the following attributes into the actual room name:

‘RESOURCE TYPE’ + ‘LOCATION CODE’ + ‘BUILDING CODE’, ‘FLOOR NUMBER’, ‘ROOM NUMBER’, ‘CAPACITY’, ‘AVAILABLE EQUIPMENT’, ‘ACTUAL ROOM NAME’ resulting in, for example:

ROOM THAMES VALLEY PARK BUILDING 5 GROUND FLOOR 0.01 96 AV VC Chicago 1

Although this might be OK for ‘behind the scenes’ reference purposes, if you are planning to use room panels or interactive floor plans to streamline room and desk bookings, our advice is to present end users with a less onerous name.

Apart from being more aesthetically pleasing on a screen, it’s obvious the resource is a room, and hopefully the staff member will know what building they are in.

So really, the only relevant information is the actual room name ‘Chicago 1’ and its booking status (free/busy). Information like the room capacity and facilities can be included elsewhere on the screen – and not be part of the name.  

Here is a nice example of how a simple room name has been extended to the actual design of the room itself – all of which helps enhance the staff (and visitor) experience.

What about desk numbering schemes?

Likewise for identifying desks, you might contemplate giving all your desks a unique number, instead of using the floor level or wing as part of the desk number.

Why?

To give you an example: I spent ages hammering on the door of a hotel room wondering why my partner was refusing to let me in.  The hotel in question numbered its rooms starting from 1 on each floor, which did not account for the fact that I inadvertently got out of the lift on the wrong floor! Thankfully the occupant of the (wrong) room was out!

An intuitive numbering scheme that by design accommodates the ‘floor level issue’ is to prefix the desk number with the floor number.  E.g. 423 would be desk 23 on the 4th floor.

A further tip if you’re looking at desk booking (and therefore desk numbering) as part of your COVID-19 return to work strategy is to number ALL of your desks, not just those desks that are suitably distanced.

We have seen (and averted) more than one project where the intention was to only give the ‘safely distanced’ desks a consecutive number.  The problem with this is two-fold:

  1. It is not a future-proof strategy as distancing requirements change
  2. It will not lend itself to a flexible workspace booking system in the future (this being an inevitable outcome of the pandemic, as workspaces shrink and evolve to support a now ‘hybrid workforce’).

See our room & desk booking solution in action

There’s many other minor (and major) things to consider when implementing systems designed to streamline your room and resource booking systems, contact us to find out more.

Setting up the concept of bookable desks – otherwise known as ‘hot desking’ – is more than just a case of designating desks and making them ‘bookable’.

A lot more.

When, some years ago, housing association, Notting Hill Genesis, set up its hot-desking scheme as a way to reduce its office costs, they thought their cutting-edge workspaces, complete with docking stations, storage lockers and a slick booking system, would be enough.

They were wrong.

The housing association’s staff were not happy with the new arrangement.

According to Jenny Quigley, project manager at the time, “Staff were taken aback when we told them they wouldn’t have fixed desks anymore, even though we were trying to provide more flexible facilities. Some even had to speak with management before they got on board with our proposals. In retrospect, the cultural change aspect of the project would have benefitted from some external mediation.”

In the case of Notting Hill Genesis, pointing out benefits of the new regime, including the ability to reduce personal expenses by being able to travel to a nearer office, and being able to work from home where it was possible, smoothed the introduction.

While it’s true, in the past, the resistance to losing one’s own desk space would have been a barrier that needed sensitive handling, COVID-19 has effectively removed this ‘human barrier’.

Safety remains a no. 1 priority

In a bid to prepare for several ‘return dates’ that came and went, many facilities teams prepared their offices for social distancing by clearing down desks of personal belongings.

This step effectively ‘forced the desk ownership situation’.   

Now, with the pandemic still not ‘over’, the over-arching priority for businesses remains that of ensuring a safe working environment as its workforce returns to the office.

Hybrid working = smaller offices

As the pandemic lifts, the writing on the wall* is that the concept of everyone coming into the office on a daily basis will be a thing of the past.

This means much smaller offices, alternative workspace arrangements (such as work hubs), and monthly team meetings in different hired venues, we be amongst the new trends.

Another stark reality is that many organisations will need to reduce their rental costs or sell off property in order to survive.

For example, drinks company Fever Tree converts office into bar recently converted half of its London office into a bar, and many of the other enterprises we speak with are electing not to renew leases on certain offices and sell properties where possible.

The savings are highly tangible: When it introduced its desk booking scheme a few years back, Genesis Notting Hill reduced the number of offices it had by 43%, resulting in year on year accommodation savings of 1M.

Hybrid working = a more receptive audience to change

The ‘good news’ for organisations having to shrink their available workspace and introduce a booking scheme, is that having experienced the many benefits of home working (there are obviously downsides), staff members will be more open to this change.

In short, the trade-off of zero commute time and a better work-life balance will mean that the typical resistance to ‘hot desking’ we’ve seen of staff losing their own desk ‘shrine’, complete with (now wilted) pot plants, favourite chair and drawers full of god knows what, will evaporate.

Not having a fixed desk booking system does bring a whole batch of other challenges, such as how to be near to co-workers in the same team, how to facilitate ‘on the job training’ (especially for new starts), locating work colleagues and having ‘ad-hoc’ meetings, but all these are addressable with the right technology and careful consideration.

Work is something you do, not a place you go

Enterprises are now seeking to use their office space in new ways that deliver tangible value to individuals, teams, and the company as a whole.

This could be a mix of solo working spaces that enable individuals to concentrate, shared spaces for collaboration with team members and video conferencing suites and booths.

Although there will instances where individuals with certain roles need a dedicated desk, the days on which this desk is not in use (e.g. during annual leave), organisations can use technology to release this resource into an available pool (known as reverse hoteling).


Optimising real-estate utilisation is a great way for enterprises to reduce costs – especially as the growing trend towards flexible and remote working has lead to increasingly under-used office space.

We’re also now facing a situation where remote working (and therefore reduced office space) may become more a a norm, against a ‘perfect storm’ of COVID-19, environmental issues, flexible working trends and extreme weather events.

To help streamline the workspace booking process, Microsoft continues to encourage the use of resource mailboxes in Office 365, and is providing new features to assist with booking meeting rooms, Teams Rooms and individual workspaces with Microsoft Teams.

For example, it is now possible to book and schedule meetings using the Teams calendar (as well as via Outlook calendar).

There are still some ‘gotchas’ when booking meetings and meeting rooms using Teams, so in this article we have provided some tips and best practices to help navigate them.

 Teams features to help users book resources

Teams contains a calendar app that is a view of the logged-on users’ calendar.

Integration with Teams means that a meeting can be booked, with a room, attendees and Teams credentials all in one process.

Within the calendar app it is possible to create and edit meetings that contain room bookings.  Selecting the meeting time span required automatically opens a new meeting window.

Adding details to your Teams meeting

Here it is possible to find a free room easily using the location field.

This can be achieved using room lists, or if Microsoft Teams Rooms are being used (see also lower in this article), proximity detection can suggest a nearby room.

Check out this article for more information on proximity detection: https://www.microsoft.com/itshowcase/blog/click-join-internal-meetings-get-a-boost-with-microsoft-teams/

Attendees can be added and the meeting scheduled, which then acts in the same way as creating a room booking in Outlook.

Teams meeting details are automatically added to all meetings booked in the Teams calendar app.

There is also bi-directional synchronisation with the user’s Outlook calendar.  For instance, you can edit items scheduled in the Outlook calendar and have those changes appear in Outlook.

https://office365itpros.com/2019/08/26/teams-new-calendar-app/

Beware Teams Meeting Booking Limitations

For example:

  • the Teams calendar has no concept of multiple time zones
  • you can’t mark events as private, and
  • you can’t drag and drop meetings between time slots.

For this reason users should not expect to organise their diaries using Teams in the same way they can Outlook.

Watch out for Booking Meetings in Channels

A concept that is unique to booking meetings in Teams is the ability to select a channel in which to meet.

Channels are sub-sections of teams, a bit like a topic within a team.

A concept that is unique to booking meetings in Teams is the ability to select a channel in which to meet.

It is important to note that when a channel is selected, the meeting booking is made by the group email address of the channel, rather than the logged-on user.

Whilst the organiser in the Teams calendar app is displayed as the user who made the booking, the corresponding booking in the Outlook calendar shows the organiser as the channel.

Also a Teams channel invitation does not automatically send invites to everyone in the channel.

If you want Team members to receive a meeting invitation you should:

Either way, it would seem that there is currently a bug if you want to book a physical meeting room from a Teams channel.  Check out this thread.

Microsoft Teams Rooms

Utilising a combination of resource mailboxes, the correct Office 365 licence and compatible hardware it is possible to create a Microsoft Teams Room which turns a regular meeting room into a fully video-enabled collaboration space.

No licencing is required for a regular resource mailbox, however, in order to enable a room as a Teams room, a licence is required.

It is possible to apply certain enterprise licences to enable a Teams room, however Microsoft have a licence type specifically for Teams rooms.  The licence includes (amongst other things):

  • Skype for Business
  • Microsoft Teams
  • Phone System
  • Audio Conferencing
  • Microsoft Intune

Once enabled and licenced, the room mailbox is ready to use alongside the appropriately configured hardware.

Working with & booking Teams Rooms


By using workspace more intensively and wisely we can reduce our use of buildings and thus our impact on the environment…

Sir Gus O’Donnell, former cabinet secretary and head of the Home Civil Service

Making the necessary changes that enable workforces to adapt to a shrinking office space – especially where that means adopting ‘non-territorial working’ – requires a multi-discipline strategy involving people, design and technology.

For example:

  • The personal benefits of working from home or having a shorter commute should be made clear as part of a hot-desking initiative – it has to be a two-way contract.
  • Office interiors should be designed to be more vibrant and flexible, with a variety of difference workspaces, storage options and fun areas for socialising – there should be compelling reasons to come into the office for team building.
  • Technology to help remove the stress of booking and finding free workspaces should be adopted.  The needs of other stakeholders such as the facilities management team also need to be addressed by whatever you choose.

If you use Office 365, the great news is that you already have the ideal platform on which to build and streamline resource booking and management.

The room booking benefits that Office 365 offers include:

1. A familiar Outlook & (increasingly familiar) Teams UI –These are the default collaboration and scheduling applications that are already embedded in users’ working practices.

2. Sophisticated calendaring – With Office 365 you have:

  • Support for shared calendars across co-workers
  • The ability to delegate calendar management to team members
  • Support for shared calendars across Outlook & Teams

4. Robust, centralised security –Your existing platform uses Windows auth and AD access rights/privileges to govern access and enable SSO.  This can be used to govern who can book what resource.

3. Advanced scheduling – Powerful tools like the Resource Booking and Scheduling Assistants and Cortana make it easy to find the right time for a group of people and coordinate schedules across multiple time zones.

5. Business continuity – Using regular Outlook calendar and other Microsoft-standard infrastructure means failover and protection against obsolescence is built-in.

6. A reasonably* robust room and resource booking model –You’re probably already using Microsoft’s native resource mailbox capability for booking rooms…

It therefore makes 100% sense that any solution you choose to streamline resource booking and management uses this functionality and doesn’t try to replicate it with a separately managed, secured and disjointed platform.

Available on-premises or in Microsoft Azure, our resource essentials solutions have been developed from the ground up to run in your Microsoft environment and leverage your existing investment in terms of user skills and infrastructure.

This means that issues like user learning curve, security, calendar privacy, delegate access, cross-time zone timings, integration with Microsoft conferencing, duplicate meetings, etc, are all non-issues.

Building directly onto your Office 365 platform we deliver:

  • Smart room and desk booking screens and devices for outside meeting rooms, receptions, lobbies, etc
  • Support for RFID badges and tags for on-screen authentication
  • The ability to book virtually any additional resources such as catering, special requests such as vegan & allergens, equipment, seating layouts
  • Facilities management dashboards for managing catering requests, rearranging meetings
  • Ability to strip meeting subjects out to avoid sensitive information being displayed on booking screens.
  • Management reporting including utilisation reports
  • *Fixing the shortcomings of native resource mailboxes, such as smarter handling of recurring meeting requests, a dashboard for FM/admin staff to manage and view all bookings, visitors, and much, much more.


See our room & desk booking solution in action

Discover how we can help you manage your meeting rooms & desk bookings in order to utilise your estates more effectively.

?>